(This post contains affiliate links. This means that if you purchase through these links I receive a small commission at no cost to you. For more information see our disclosure policy here)
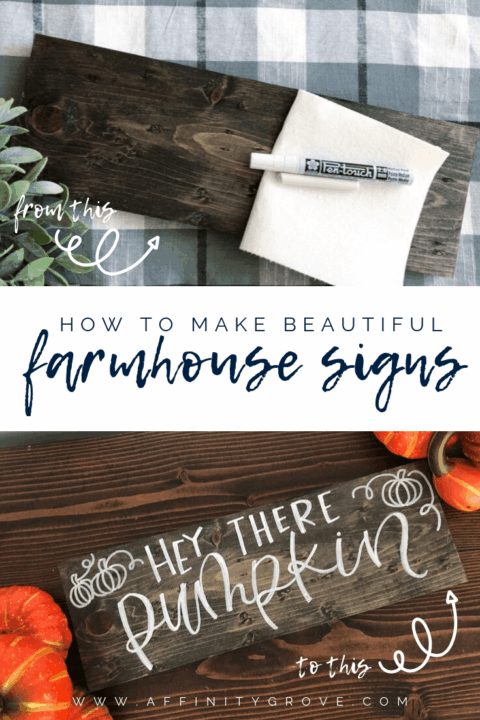
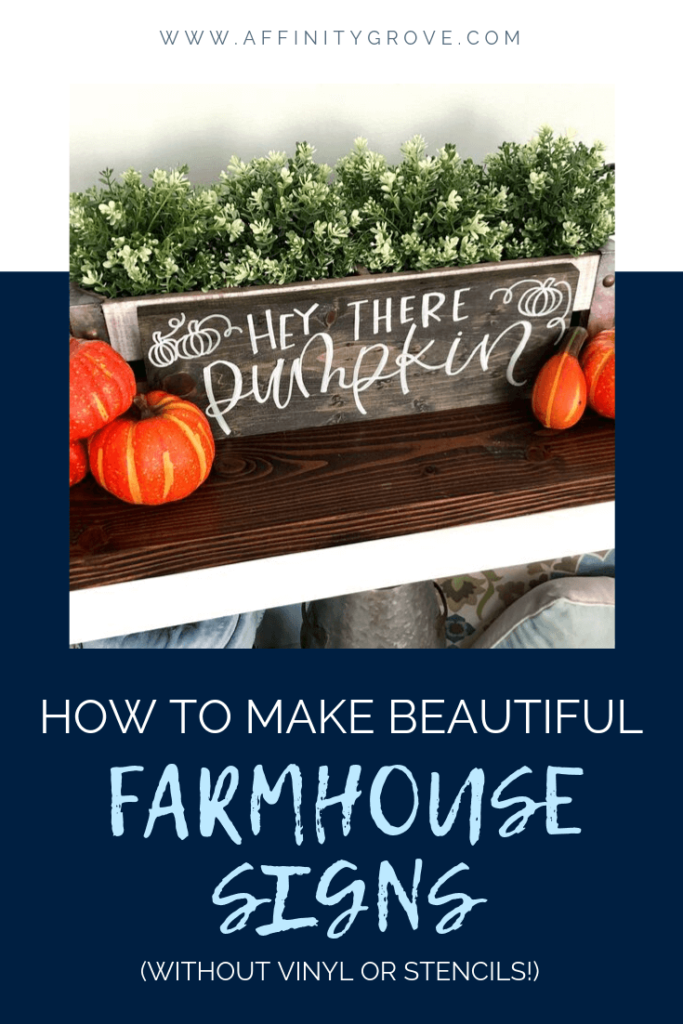
Making Beautiful Farmhouse Signs is possible for anyone and I’m going to show you how simple it can be! I have wood lettered signs all over our home! it’s a super easy, and inexpensive decoration that is personalized and unique! I love when I can create the size I need for a certain space and have it be the perfect fit!
If you don’t know how to hand letter don’t worry! But if you want a few tips before you begin or some practice you can check out this post on making hand lettering unique, this post with some lettering tips and these practice sheets!
Before you begin figure out what quote you want to write on your board. That’s always half the battle! Once you have that figured out grab your supplies and let’s get to it!
Supplies You Need

One of the best parts of creating these signs is that you don’t need a ton of supplies! You don’t need an expensive cutting machine, or have to deal with vinyl sticking together! And they turn out great!
You will need:
- A stained board-HomeDepot or Lowes will cut your wood for you! They will do the first few cuts for free and the it’s only $0.25 per cut after that! So if you don’t have a saw, just have them cut it for you! My favorite stain colors are Ebony, Dark Walnut, and Classic Gray
- A Paint Pen-I have tried them all and my favorite is the Pen-Touch 2.0 mm Medium Point Paint Pen in White, It’s completely opaque, and really acts like a paint rather than a watery mess! Trust me not all paint pens are the created equal!
- Chalk- I have the Anti-Dust Chalk it definitely seems like it still has dust! Really you just need some chalk! I have a little pencil sharpener that I occasionally use to sharp the chalk if my design is more intricate.
- Paper Towel- I use this to tap the tip of my pen when the paint has stopped flowing well. If I remember to do this frequently the sign turns out way better!
Design with Chalk
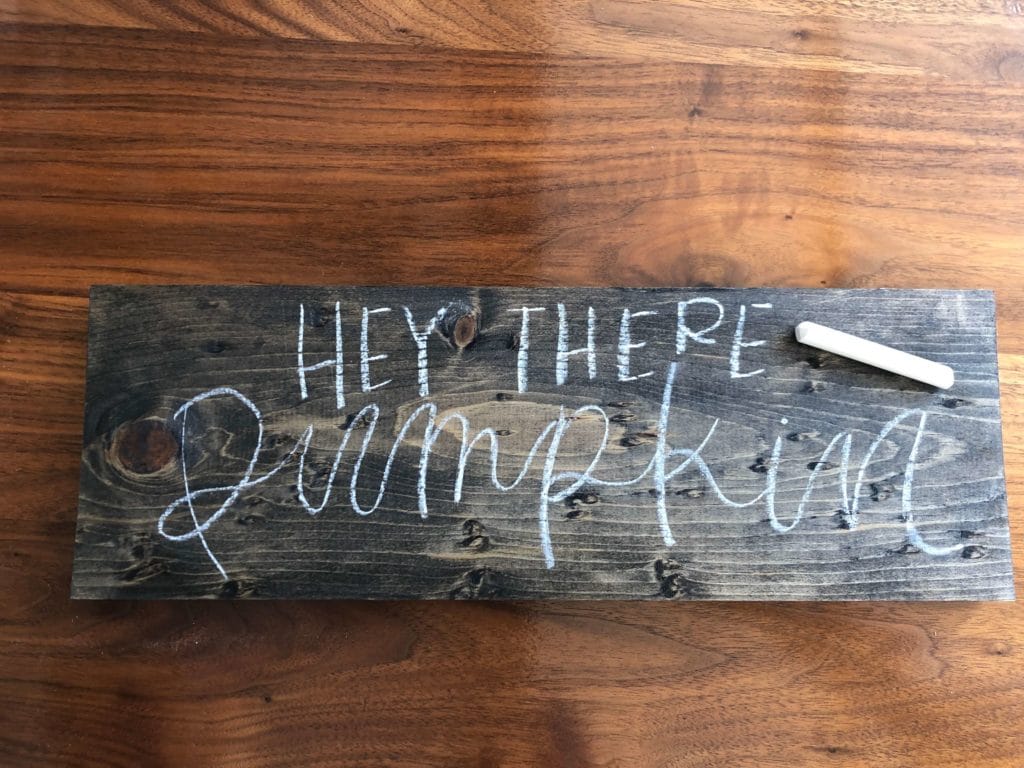
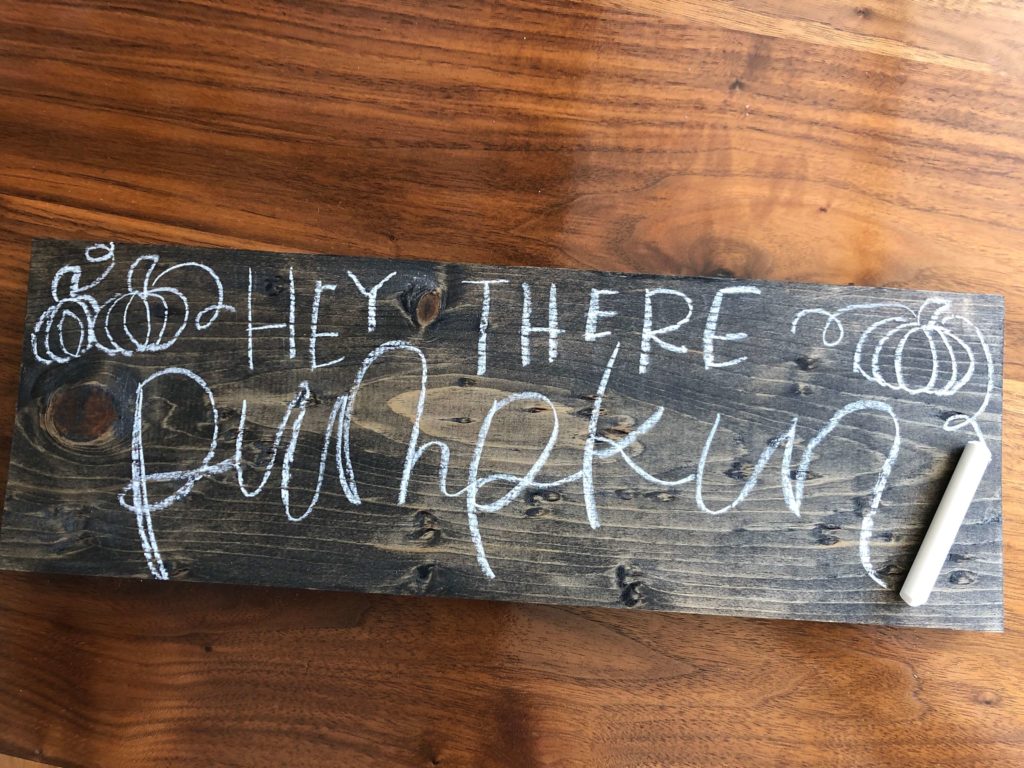
The best kept secret to creating these signs in CHALK! Design in chalk first! This helps you figure out your placement, which letters you want to adjust and helps you see the overall look of the sign! I wanted more variety in height, so I erased the first example above and drew out the second example.
I love that you cant just erase without having to sand or garbage the sign because you don’t like how it looks! There were many a sign I ruined before I discovered the chalk trick. Either the text wasn’t centered, or the quote didn’t have enough variety! If you want to make beautiful farmhouse signs, design with chalk!
Once you have a layout you like, you can add embellishments, change up letter styles and really nail down your final design. Once you are completely satisfied you’re ready to paint! If you totally hate it, no problem, wet down a rag, rub it off and start all over!
Seriously chalk is magic!
Paint over using Fauxligraphy
Shake your paint pen to begin! That will make sure the pain is ready to go and will flow better!
Start painting over your design! For the calligraphy effect you want to use fauxligraphy. If you don’t know what that is you can check out this post that teaches you this super simple, yet amazing trick!
Fauxligraphy will give you that beautiful calligraphy look but without actually using a brush! It will make the difference in a sign that looks good, and a sign that looks great! Trust me, it’s super easy so try it out! You won’t be disappointed!
Start out from the top left and work your way across and then down. (If you’re right handed! Lefties, do the opposite!)
The paint takes a while to dry, so you want to make sure you aren’t going to smudge it with your hand as you go. Be careful of anywhere you could ruin it with your hand as you write across the board.
If you rub your hand across the chalk if will erase it and be difficult to trace. So be careful as you write to move your hand lightly across the sign!
Sometimes the chalk will gum up a bit and make it difficult to have the paint adhere. When that happens it’s usually because the pen is too dry. Tap the top of the paint pen on the paper towel and the paint will flow more freely and you should be able to paint again!
Once you have painted the whole sign, don’t be too impatient to get that chalk washed off. I have ruined countless signs from impatience! It is paint, and it will take time to dry! Think of how long you would wait if you had done it with a paint brush! I typically give it 20 minutes or more just to be safe!
Get a damp towel and wipe all the chalk off! And you’re done!
Admire Beautiful Sign!
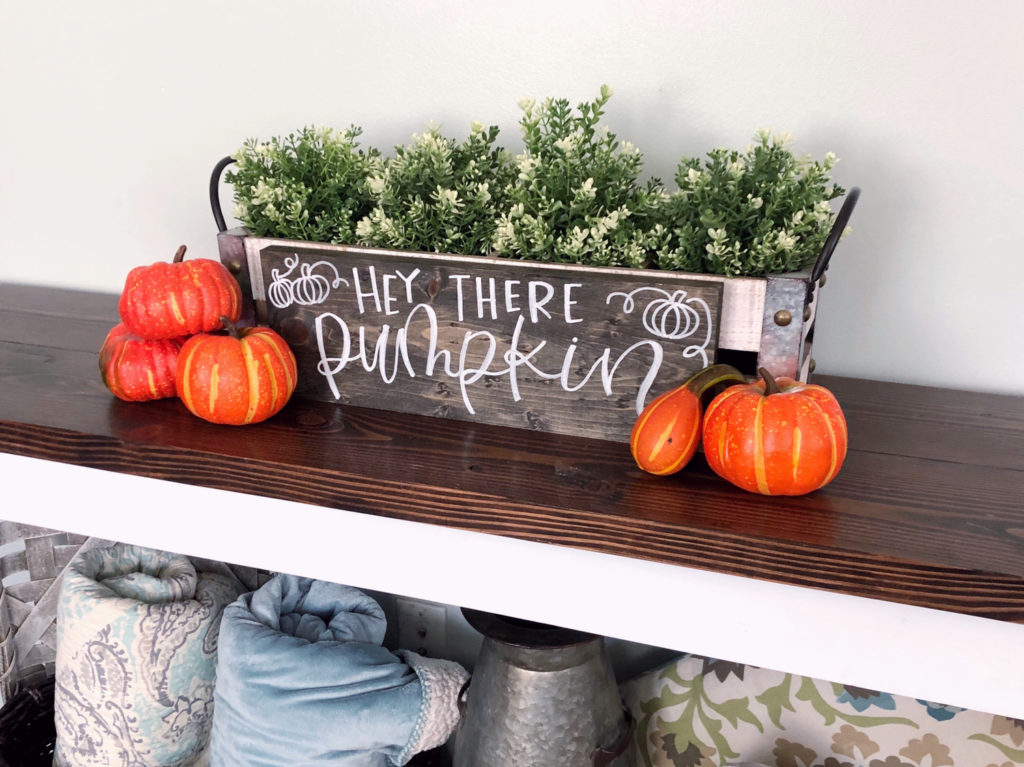
Stand back and admire your beautiful farmhouse sign! You did it! See I told you it wouldn’t be too hard!
I sometimes stain both sides of a sign and paint each side. Then I use it for different seasons so I have less to store! It’s nice to just flip it over at the end of the month and use it again for another month!
I love that you can create personalized signs that are beautiful and unique!
Good luck creating your next painted sign masterpiece!
Tag me on Instagram @affinitygrove and show me what you created!
Want to learn more about hand-lettering?


No comment yet, add your voice below!