
(This post contains affiliate links. This means that if you purchase through these links I receive a small commission at no cost to you. For more information see our disclosure policy here)
I have always loved to put a Word Overlay on Photos when we send out cards for anything. Typically I design them special for each occasion and card, and I love doing it! And more importantly, I love the way they look when they’re finished.
Recently I created a some fun Word Overlays that you can put easily put on your photos, and I wanted to teach you how easily add an overlay to a photo for FREE! The photo design website I use is called Canva. You can also do this process + a little more in Photoshop which has a 7 day free trial!
I personally use both of these design programs extensively and I love them both for different reasons!
How to add Word Overlay on Photos in Canva
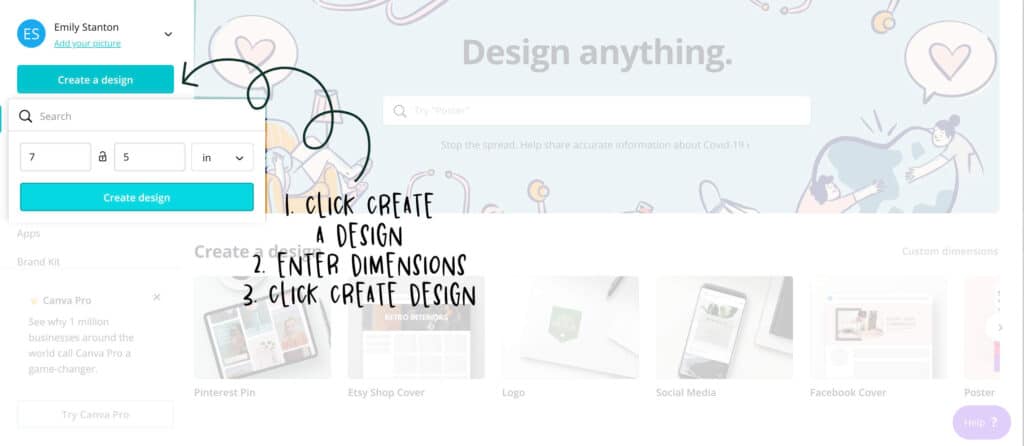
The Canva dashboard is super user friendly! You can create all sort of designs, or you can use designs that are pre-made and put in the info and text you want! To start out go to Canva’s website by clicking here. Above is the home screen of Canva, where you can select the size of design you would like to create.
They likely have the size of something you want, but even if they do, it’s super fast to just put in your dimensions. To do this click on the top right side of the site on the green button Create a Design. Enter the size you want your final product to be and click Create Design.
Canva will automatically bring you into their design panel where you will be able to upload and edit your design!
How to Upload Design in Canva
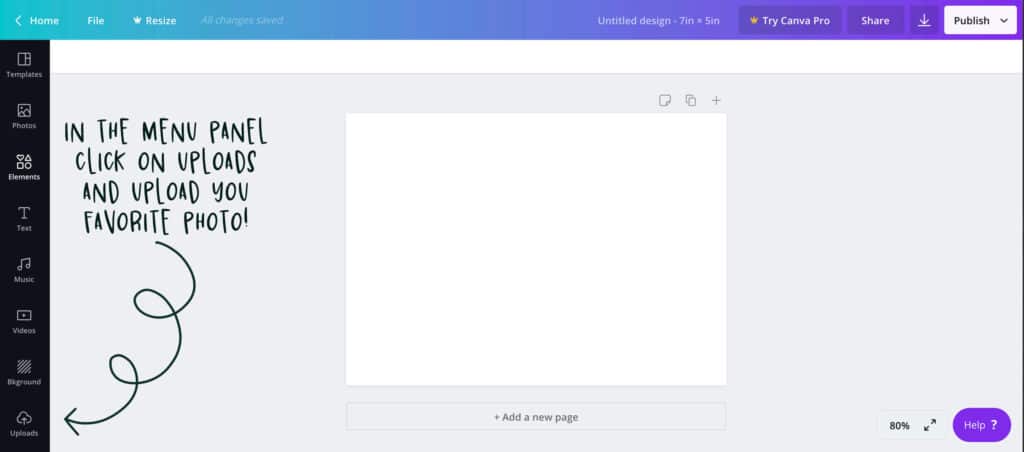
Once you have selected the design size that you want it will bring you into the design panel. Here you will do all your designing before you save your photo to print.
On the Left black Options panel look toward the bottom and select uploads. Click on the upload an image or video and select the photo you want to use!
Once the image is uploaded click on the image, or drag it, to send it onto the canvas to start your designing!
Resize Uploaded Picture
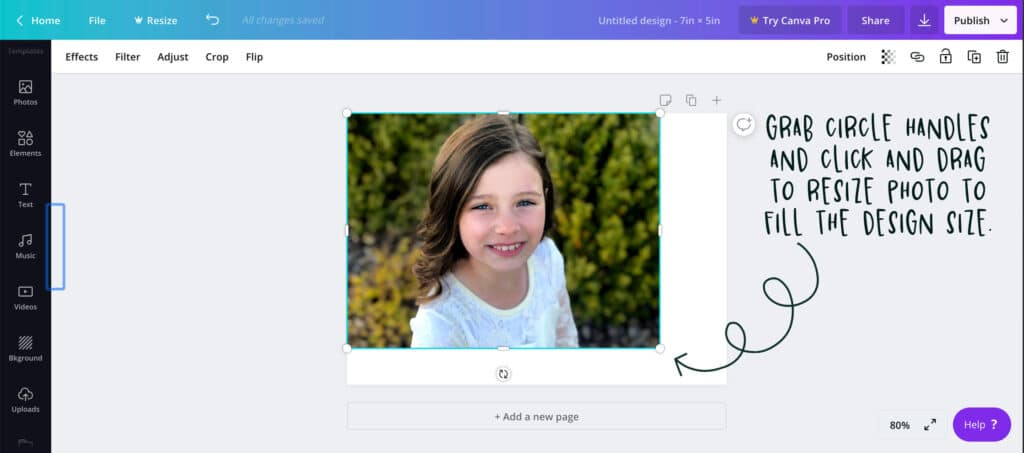
Once you have your picture placed in the design space you need to resize it! To resize the photo click on the circle nodes in any corner and drag to the desired size. If you need to resize after clicking out, just double click on the photo and the nodes will appear again and you can resize.
Now that you have resized your image, you’re ready to upload your overlay. Follow the same process as above by clicking on the upload button and selecting from your files the overlay you want to use. The best file for this is a transparent PNG. This type of file will just be the words, without any white background!
Adjust Overlay + Add Optional Text
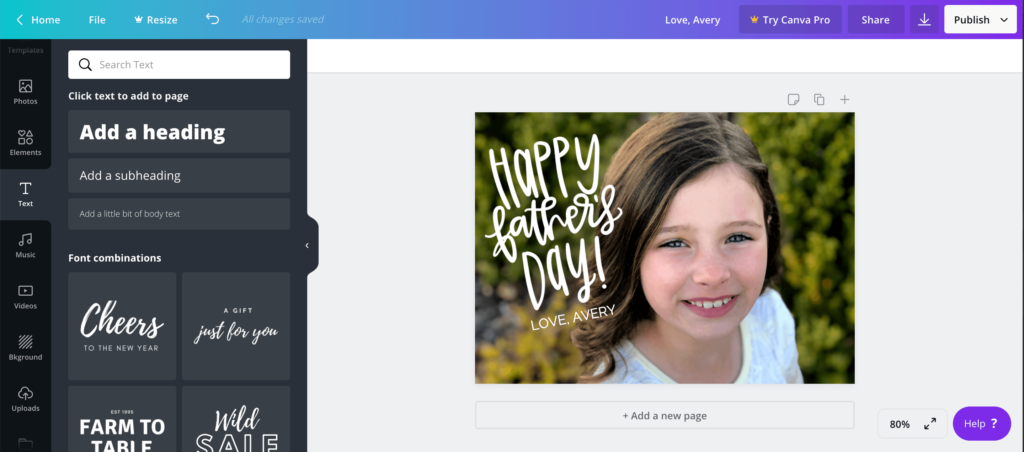
After you have entered your Overlay, adjust it as described above by pulling the nodes until it’s the desired size! Place the Overlay over your photo where you want it to be! Then you can add other additional text, such as the love, Avery above. To do this click on the text button on the left and select add a little bit of text. Type in what you want it to say and play around with sizing and fonts until you get it to your desired look!
Once you get your word overlay on your photos and it looks the way you want it you’re ready to download!
Download Photo + Print!
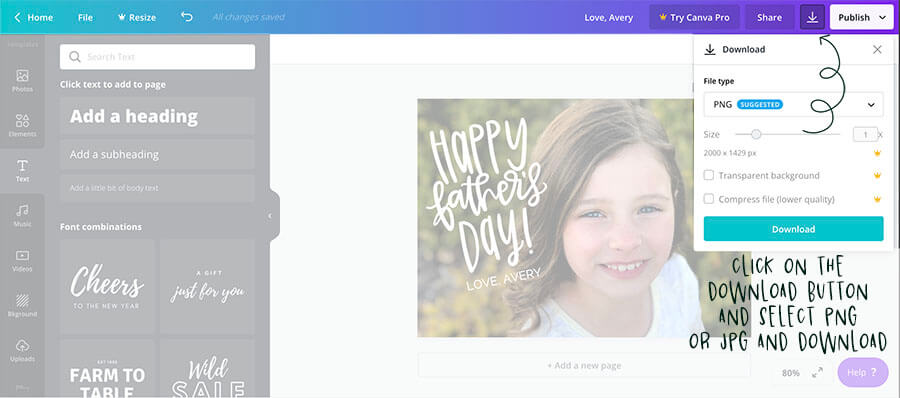
Click on the Arrow pointing down to download your photo! You can change the download attributes by upgrading to Canva Pro. But likely you won’t need to change the download requirements, and the free version should work great!
Most photo printers will let you upload a PNG or a JPG so you can select either of these options, the PNG option is suggested, and I have found works great.
Then click on the download button and the file will automatically start downloading!
Upload to your favorite online photo printer and have them delivered right to your home, or pick up in store!
For special occasions, pair with a clip frame like this one or this one with lots of pictures! I love that you can easily switch out these pictures with new ones!!
Bonus Design Features in Photoshop!
Photoshop is a like Canva, but on steroids! Because you can do so much more. If you are interested in being able to do more with your photos this is a great program.
One thing you aren’t able to do in Canva is to change the color of your overlay! However this is easily done in Photoshop! To do this Create a new layer and fill with desired color and place above the overlay layer. Next right click on the fill layer and click Create clipping Mask. This will fill the color of the Overlay with the fill color of your layer. Now Right click on one of the layers and Merge the layers together so you can copy and paste onto your photo!
As well as changing the overlay, there are lots of Photo editing capabilities in photo shop if you want to edit your picture before placing your overlay!
Affinity Grove Overlays
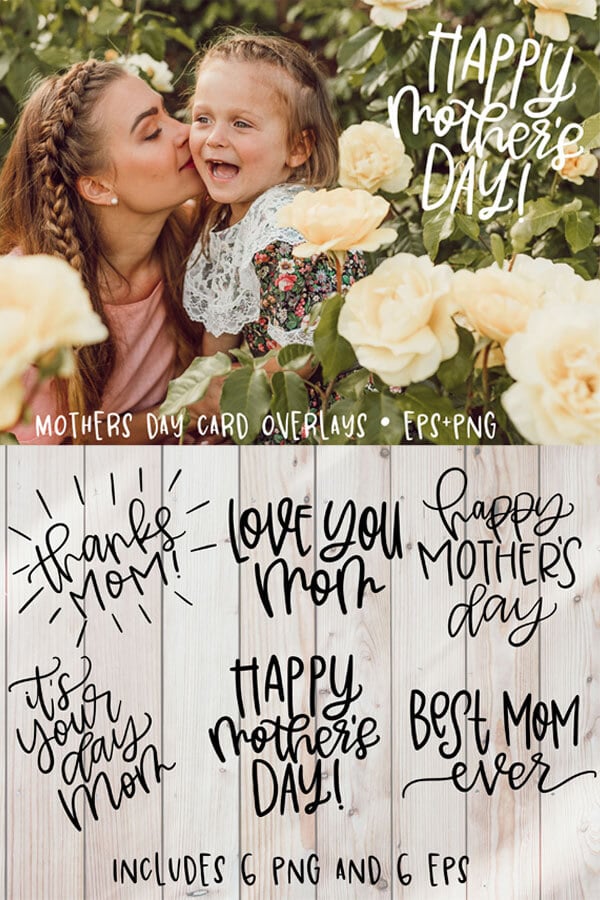
I currently have 2 set of overlays available, with a few more in the works that I’m hoping to release this month! So keep your eye out as I will be posting them throughout the next couple of weeks! Right now I have a set for Mother’s Day and Father’s Day! Or really any time you want to celebrate mom or dad! You can preview them below!

I hope you love the outcome of your Word Overlays on photos for your loved ones! This is a great way to personalize the photos you love to create a one of a kind gift or greeting card!
I’d love to see what you create, tag me on instagram @affinitygrove to show me the cards or photos you create!
You can check out some other free design resources in this blog post here!

No comment yet, add your voice below!